Recipe: Rustic Peasant Bread
I’ve been baking with yeast for over fifteen years, and with my own sourdough starter for going on 3 years now. I love bread. It’s one of my five favorite foods** and I’m always trying new recipes to add to my Sanctum Bakery recipe file.

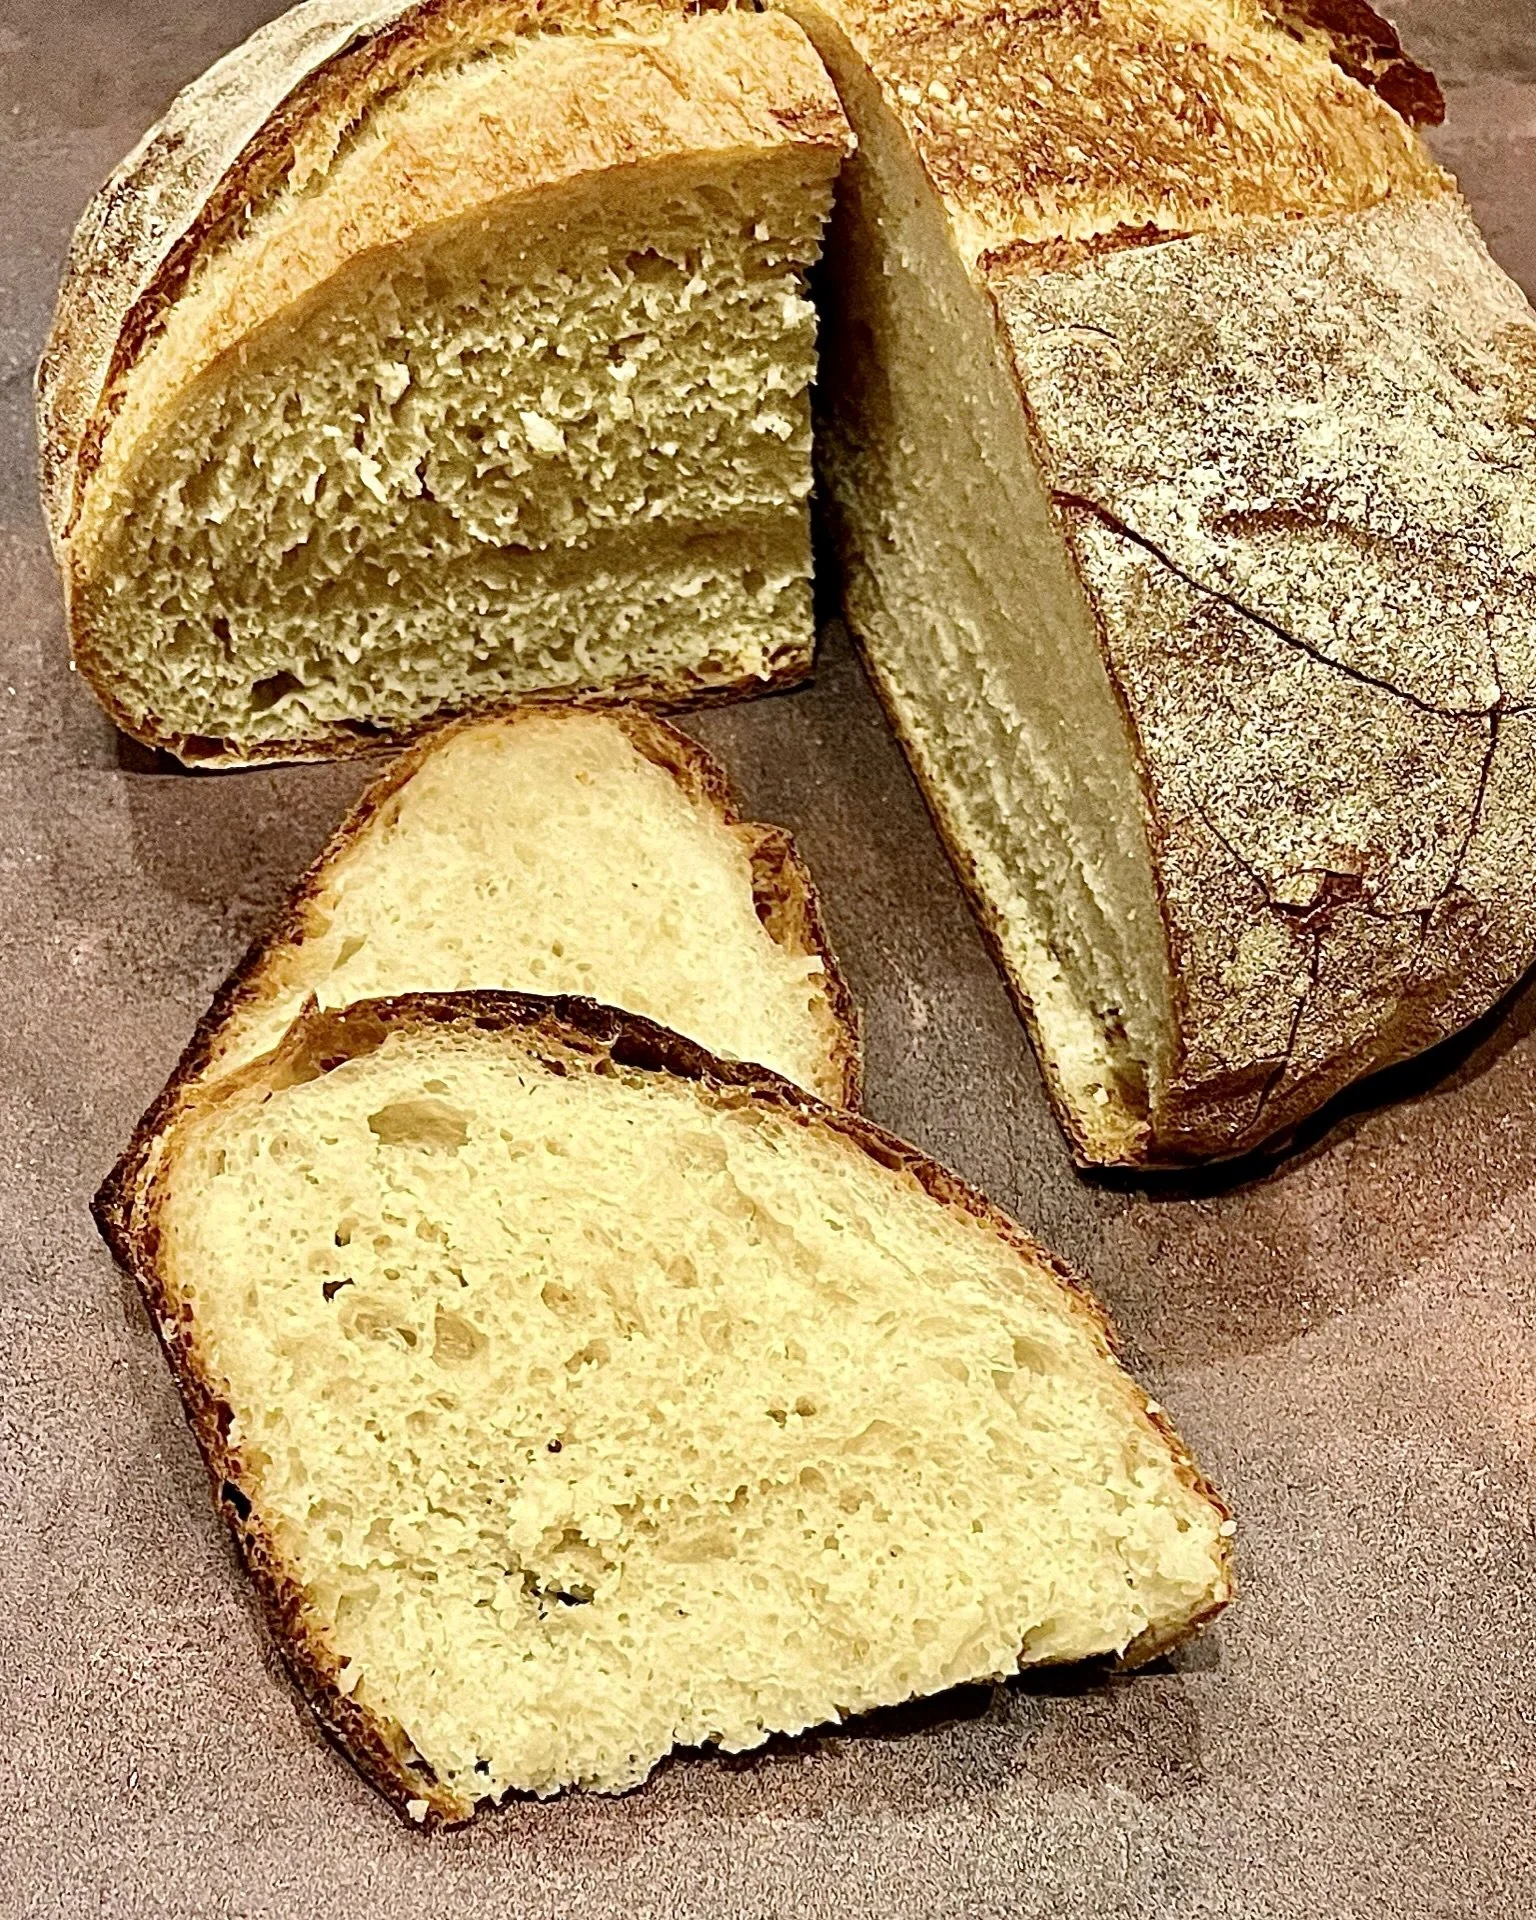
When making leavened bread, so much of its flavor comes from development time; this is why no-knead breads taste so amazing, especially given how easy they are to make. But the trade-off here is time; no-knead bread flavor benefits from a long creation cycle, sometimes as long as 24 hours, but that means planning ahead. So what do we do if we want crusty, tender, flavorful bread made same day? We work to find a recipe that blends the best of both baking worlds, which is to say, shorter time and deeper flavor. This Rustic Peasant Bread recipe is the closest blend I’ve found to date.
The original recipe for Peasant Bread comes from King Arthur Baking Co. I made it a few times exactly as written and then started tweaking the process to suit my palate and my kitchen workflow.
I appreciate that the original recipe details how to bake the bread without a dutch oven or similar enclosure - perfect for bakers without those equipment pieces - but the bread develops far better spring (rise in oven) when using a dutch oven or similar, so that’s how my version works. If you don’t have an enclosed, oven-safe container for baking, just click here and follow the original directions.
I also add a bit more sugar for better flavor development (the bread does not taste “sweet” afterwards because the yeast consumes most of it in the fermentation process) and proof the yeast beforehand to ensure it’s active and also jumpstart the fermentation process.
If you’ve baked no-knead bread before, I think you’ll love this recipe because it delivers almost-identical results with far less wait time. If you’re new to baking bread with yeast, I think you’'ll love this recipe because it’s difficult to mess up and yields a loaf of bread that is tasty on its own with salted butter, yet sturdy enough for toast, sandwiches, french toast, bread pudding, etc.
RUSTIC PEASANT BREAD
Ingredients:
12g Sugar, ideally Raw but White is fine (about 1 tbsp)
7g Active Dry Yeast (2.25 tsp or one pre-measured packet)
450g Water, lukewarm (about 2 cups)
480g Bread Flour or AP Flour (about 4 cups using the spoon-and-level method)
10g Salt (about 1.5 tsp)
Instructions:
In a large bowl, mix together sugar and yeast. Add water. Let yeast proof until it’s active (looks foamy and bubbly), usually about 5 minutes. (If you have instant yeast, skip this step and stir water, sugar, and yeast into flour during Step 2.)
Weigh or measure flour, then add flour and salt to yeast mixture in bowl. Mix until the water is absorbed and the dough comes together. You want a shaggy, sticky ball to form. If the dough is dry with pieces falling off, add 1 tbsp water and mix to combine. If the dough is so wet it can’t form a ball, add 1 tbsp flour at at time and keep stirring.
Cover bowl (a towel, plastic wrap or aluminum foil all work fine) and set aside in a warm spot to rise until the dough has doubled in bulk. The oven with the light on works well, or if your house is cold you can preheat the oven on its lowest setting and turn it off as soon as it’s at temperature. (On hot days I put my bowl outside covered with a towel so it benefits from the local microbiome.) The rise usually takes about two hours but check the dough periodically after one hour.
Once the dough has doubled, turn it out of the bowl onto a floured counter. Shape the dough into a round loaf (aka a boule). I like to fold the dough into thirds, then thirds again, to give the loaf some structure; this is called the Envelope Fold method, but any method works just fine. Click here to easily learn how to shape a boule >>
Place the shaped loaf in a proofing basket - a bowl lined with a well-floured towel works well too - with the seam side facing up. (The seam side is the “bottom” of the loaf when it’s shaped, the part of the bread that isn't taut and smooth. We want the smooth side facing down in the bowl so it lands face up when we bake the loaf.) Let the loaf rise until it doubles in size again, usually about another hour, often longer if your kitchen is cold.
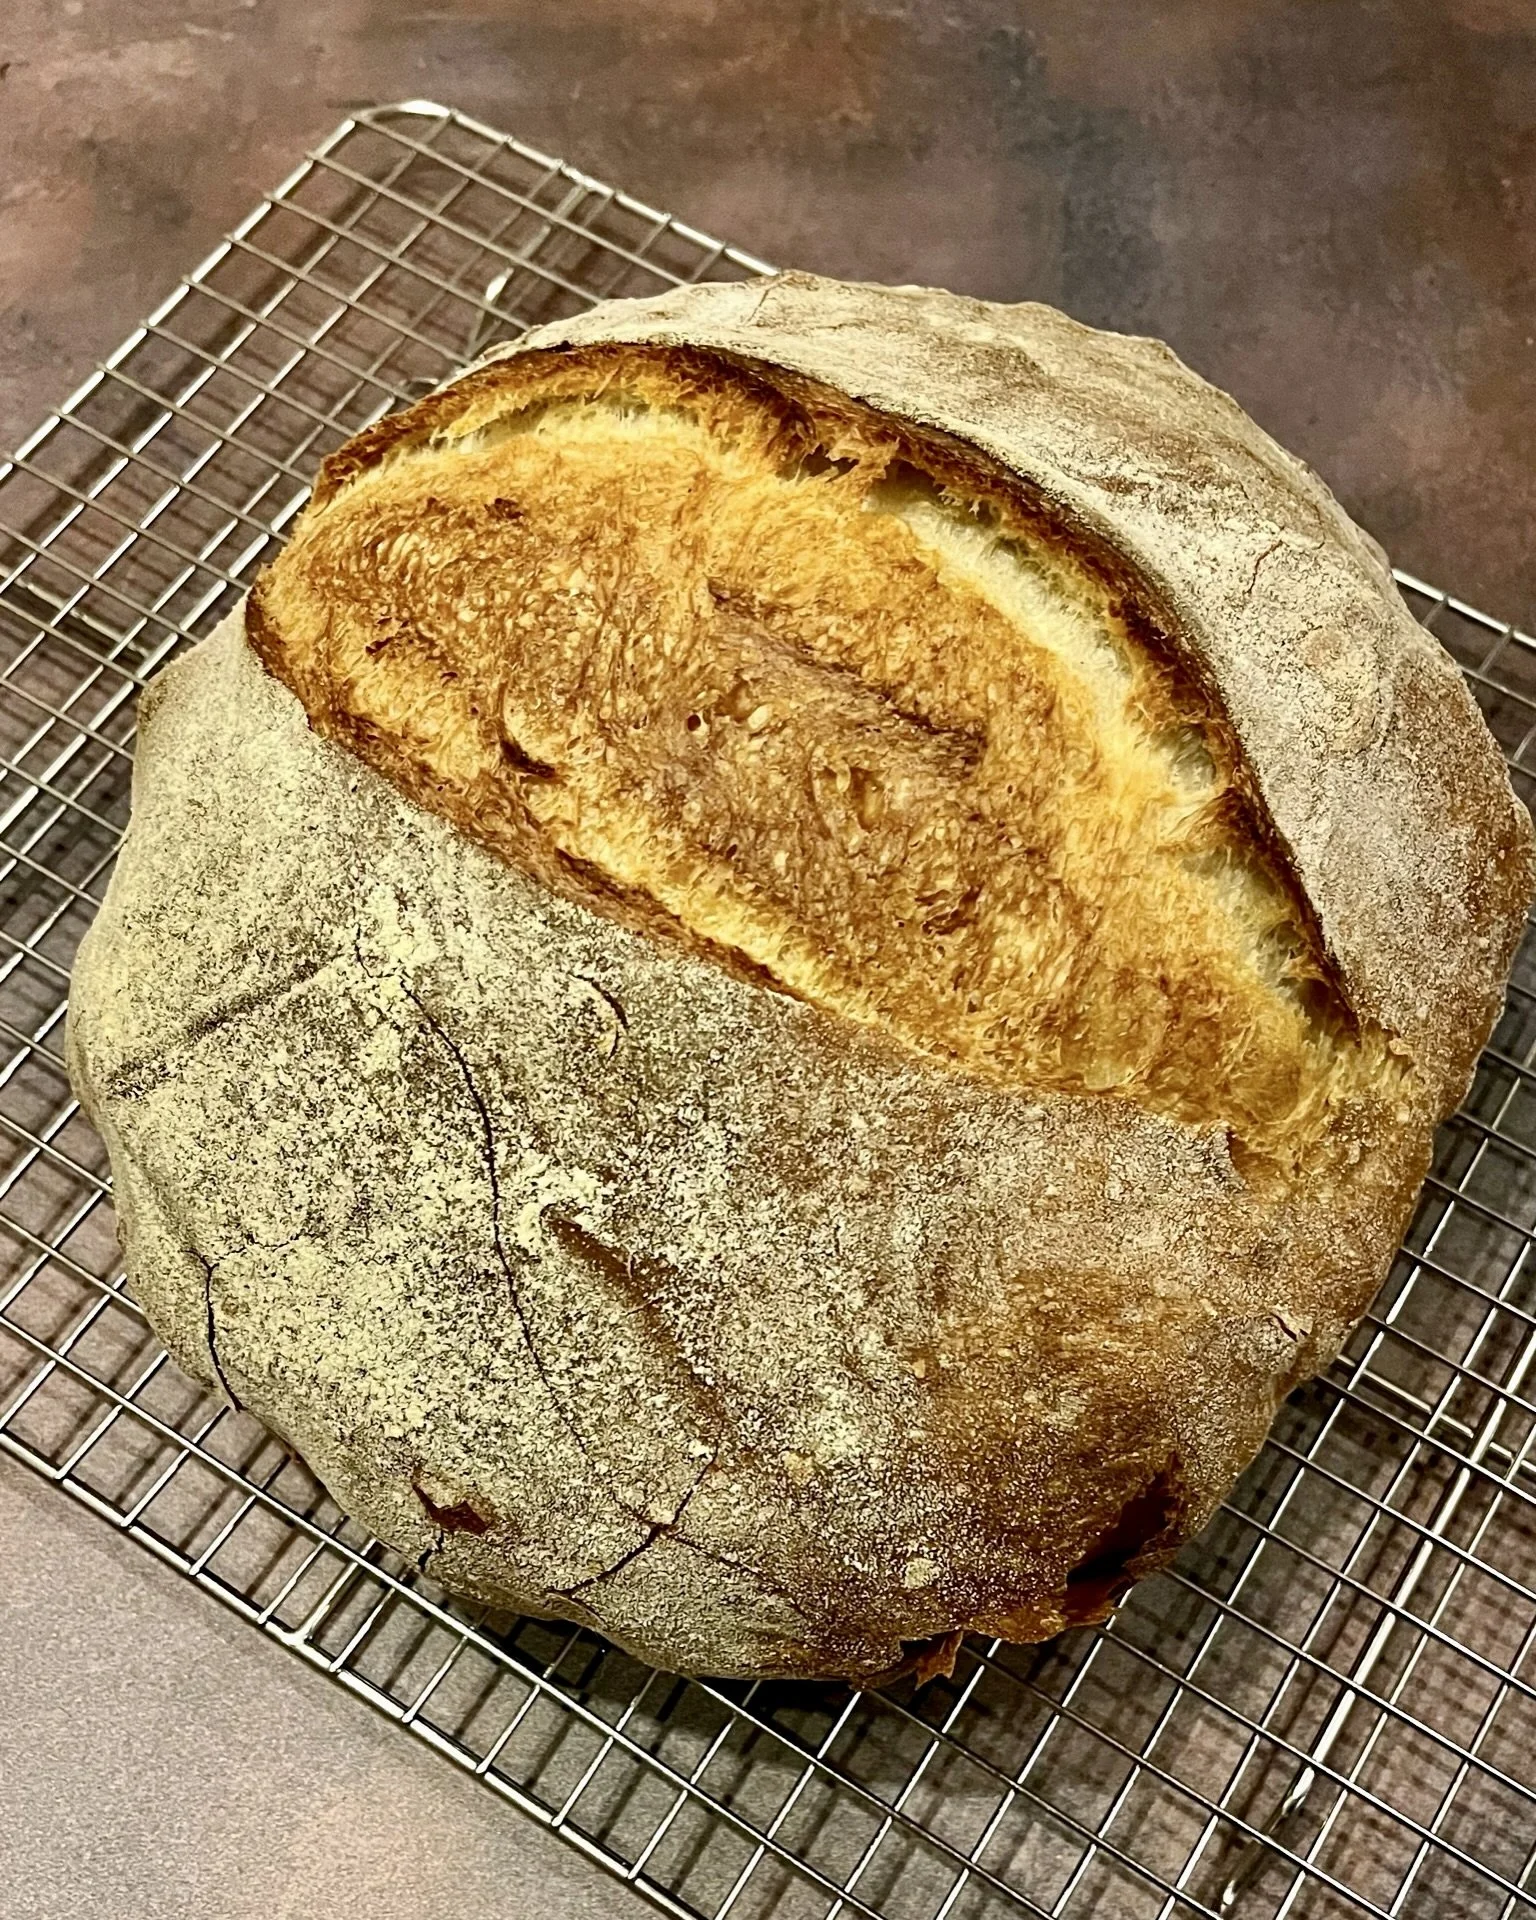
While the loaf rises, place a dutch oven (or any oven-safe container with oven-safe lid) on the middle rack of your oven and preheat oven to 450 degrees F. Getting the container hot is key to evenly baked bread with great spring.
When the loaf has doubled in size again, it’s ready to go into the oven. Carefully remove the hot dutch oven and remove lid. Turn out the loaf of proofed bread onto a sheet of parchment paper to prevent sticking and carefully place the parchment into the hot dutch oven. Use oven mitts or grilling gloves if you feel nervous. (If your container is well-seasoned, or you know from experience that the dough won’t stick, you can turn the loaf out directly into the container - but I like to use parchment paper just in case.)
Using kitchen shears or a sharp knife (or a lame if you have one) make one or two shallow cuts on the top of the loaf. This is called scoring and it helps the bread vent steam as it bakes so the loaf rises evenly. Any cut will suffice but you can click here for detailed directions.
Place the lid on the container and move container back in the oven. Bake the bread, covered, for 30 minutes; this traps steam during baking and helps the bread spring, or rise taller. After 30 minutes remove the lid and continue to bake for 15 to 30 minutes longer, depending on how dark and crackly you like your crust.
When bread is the color you like, remove from oven and carefully turn the loaf out onto a cooling rack or heat-safe cutting board. It’s best to let the bread rest before slicing so the steam inside has time to re-absorb; if possible, plan to let the loaf sit for at least 30 to 60 minutes before serving for optimal texture. You can put the loaf in the fridge or put it in front of a fan to speed up this process (in the winter I like to put fresh-baked loaves just outside our door for a faster cool).
**My five favorite foods: berries, bread, butter, crab, and smoked fish